The Best Beer Can Chicken and 6 Sides to Serve With It
Beer can chicken may seem like a crazy way to cook a whole chicken, but hear us out… it really creates a moist, flavorful bird on the grill without much effort.
If you are concerned about a “beer taste” being added to the chicken, don’t worry. The chicken will not taste like beer. Not only will we show you how to cook amazing chicken, we will also share some great beer can chicken sides as well!

What Is Beer Can Chicken?
Cooking a whole chicken on a grill may seem impossible without a rotisserie spit. However, one way you may not know of is through the use of a beer can.
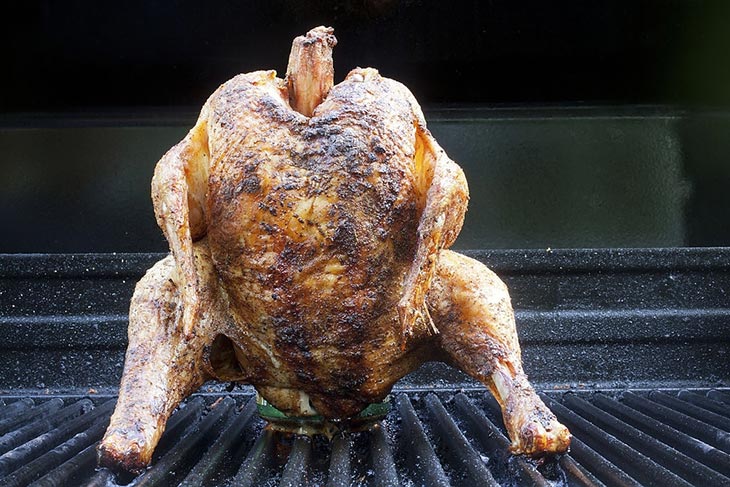
So, what exactly is beer can chicken? Some other cultures may call it drunken or dancing chicken, Coq au can, beer butt chicken, or chicken on a throne. All these terms mean the same thing: a whole chicken sitting on a beer can over indirect heat.
Indirect heat can be achieved on a grill by lighting the burners on one side, and placing the bird on the other.
You begin by placing the beer can into the animal’s “bottom” cavity. The beer inside the can will provide moisture and a little flavor to the meet. It also helps the bird stand up, so it cooks more evenly.
The full recipe is below.
The Best Beer Can Chicken Side Ideas
Below are some of the best quick and easy side dishes for beer can chicken, with their recipes.
1. Stuffed Mushroom

Ingredients
- Kosher salt
- 2 tablespoons of butter
- Pan cooking spray
- ½ cup of breadcrumbs
- 2 minced cloves of garlic
- 1 and ½ pounds of baby mushrooms
- 1 tablespoon of chopped thyme
- 2 tablespoons of chopped parsley (prepare more if you want them for garnish)
- 4 ounces of softened cream cheese
- ¼ cup of grated Parmesan cheese (prepare more if you want them for topping)
- Black pepper (Freshly ground)
Instructions
- Turn on your oven to preheat it to 400°. Spray some cooking spray on top of your baking sheet.
- Prepare the mushroom: Roughly chop the mushrooms’ stems and place the caps in the prepared baking sheet.
- Melt your butter with medium heat and throw in your chopped stems. You should cook them for 5 minutes. That is when you’ve dried the moisture out of them. Put in the garlic and continue for one minute to sense the fragrance.
- Next, let the breadcrumbs join until it is toasted slightly. That would cost you three more minutes. Before removing the skillet, season them with pepper and salt and let them cool down.
- Mix that mixture with thyme, parsley, cream cheese, Parmesan, and some pepper and salt in a bowl. Fill the caps with that and use the spared Parmesan for sprinkling on top.
- Put the filled caps in the oven for 20 minutes. They should become soft with golden tops. That’s what tell you’re done.
2. Asparagus

There are many methods of cooking asparagus to be a side beer can chicken:
- Roasting: Put it on an oven sheet with pepper, salt, and olive oil. Drizzle some balsamic vinegar over the top and roast it at 400 Fahrenheit for about 10 minutes, or until tender.
- Grilling: Keep it simple, or you can use some bacon, cheese, or prosciutto to wrap. Cover it before putting it in the grill.
- Breading: Throw them into an air fryer with a sprinkle of breadcrumbs on top.
3. Sautéed Brussels Sprouts

This is my favorite side – with roasted chicken or not.
Ingredients
- Brussels sprouts, split in half
- 2 TBSP Olive oil
- Pinch Kosher salt
- Pinch Black pepper
- 1 TBSP Balsamic Vinegar
Instructions
- Choose a skillet with a heavy bottom. Then heat your oil and put the brussels sprouts in. Cook them until they are caramelized.
- Add salt and pepper to taste. You’ll need more salt than pepper.
- Remove from heat and mix the balsamic vinegar in. Serve hot.
4. Roasted Eggplant

Ingredients
- Ground pepper
- ¼ tsp of grated garlic
- ¾ tsp of kosher salt
- ¼ cup of olive oil
- 1 tbsp of chopped basil (fresh) (you can alternate this with Italian parsley)
- 2 lbs of large eggplants (should be 2 medium units)
Instructions
- Preheat your oven so it reaches 425℉.
- Prepare the eggplants: cut them into 1” chunks, round slices, or long planks, depending on your preferences.
- Mix your prepared eggplants with kosher salt, ground pepper, and olive oil.
- Line a baking sheet over parchment paper.
- Pour that combination over that baking sheet and make a flat layer.
- Put that into the oven and roast until browned, which should cost you about 30 – 35 mins. Slightly stir your sheet once it reaches 25 mins.
- If you decide to cut eggplants in planks, flip them when the timer hits 20 mins, and cook for 35 – 40 mins. The result should be tender and browned.
- After getting your eggplant out of the oven, gently sprinkle herbs and garlic on top.
5. Corn On The Cob

Ingredients
- 6 ears of corn
- Kitchen towel
Instructions
- Place one rack in the oven, then preheat the oven to 400°F.
- Don’t prepare the corns beforehand, just leave the silks and husks attached. Then place them on that rack lengthwise. They should be 1” apart.
- Roast them for about 30 mins. Next, remove those in the center, and test if they are done or not by slightly pulling the husks back to see. If you see some swollen kernels that shine (probably some might get browned), then it is good to go.
- Take them out of your oven and chill for 15 mins. Use the kitchen towel to hold the corn from the base, so you won’t get yourself burned, and pull back the silks and husks simultaneously.
6. Potato Salad

Ingredients
- ¼ tsp of grounded black pepper
- ¾ tsp of onion powder
- 2 tbsp of mustard (whole-grain)
- ¼ cup of sliced chives
- ⅓ cup of kosher dill pickles (chopped)
- ½ cup of mayonnaise
- ½ cup of chopped celery
- 1 and ½ tsp of kosher salt
- 3 tbsp of lemon juice
- 2 lbs of red potatoes
- 4 eggs (large)
Instructions
- Boil a middle-sized pot filled with water. Delicately lower your eggs into that boiling water using a strainer with fine mesh.
- Then cook them for about 10 mins, and drain right away with your ice bath. Peel their skins off and store them in your fridge for later use.
- Prepare the potatoes: Cut them into pieces that are about bite-size (1” cubes). Next, place them in a big pot and pour cold water covering one inch over the potatoes.
- Boil the pot and then lower the heat to simmer it in 6-10 mins. You will get tender potatoes boiling this way, letting your paring knife piercing in easily in the center.
- Add salt and lemon juice in before the potatoes get cold and combine. Put them in the fridge to chill for 20 mins.
- Combine pepper, onion powder, mustard, chives, pickles, mayonnaise, and celery in another bowl. Chop down the eggs that you boiled at the beginning into pieces (bite-sized only).
Combine this mixture with the potatoes and mayonnaise without getting the potatoes and eggs crushed. Adjust the taste with lemon juice or salt if you want. Serve immediately or store in your fridge for later use.
The Best Beer for Beer Can Chicken
The best beer to use would be a cheap, light beer. This means Coors Light, Miller Lite, Busch, Keystone… something cheap with little flavor.
You wouldn’t want to waste a premium beer on this recipe. The flavors from the beer simply won’t make a huge difference in the final taste of the meat. Oh, it would work, but I’d rather drink a good IPA or stout instead of wasting it on this.
In a pinch, you could always use a pop can, or an empty can of vegetables. Empty the can out, give it a good rinse, and fill it halfway with water. This will do basically the same thing.
How To Cook Beer Can Chicken
Ok, now you have your sides ready. The next step is to get that bird on the grill.
Ingredients
- Disposable Tin Foil Pan
- A can of light beer (non-alcoholic beer works too)
- Thyme, pepper, and salt
- One whole chicken
- A meat thermometer
Instructions
- Remove the bird’s giblets, then rub the meat with a 1:1:1 mix of the spices. We recommend you use some thyme, pepper, and salt, but paprika and garlic powder go great here as well.
- Treat yourself to half of the beer (because we only use half)
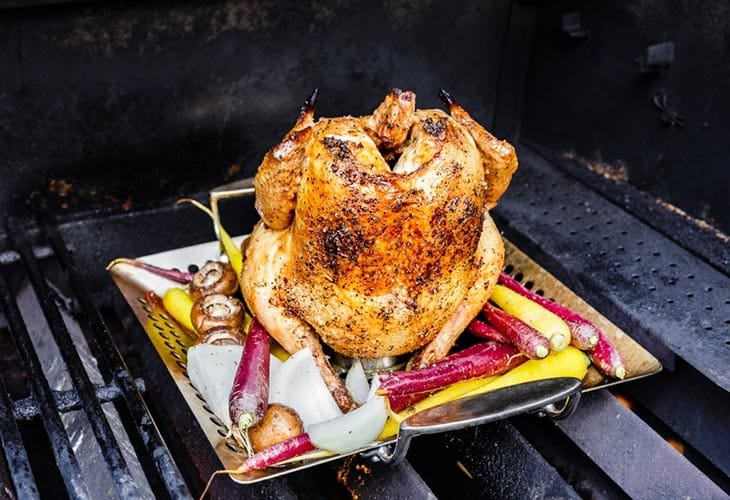
- Place the bird on top of the can with about half the can inside the bird. The bird’s legs should be able to help steady bird+can contraption and hold itself upright.
After the preparation is complete, cook it via one of the following two methods:
On The Grill
- Preheat half of your grill to 375°F (medium).
- Place the pan with the chicken can on top of the grill opposite of where the flames are (the “cold side”) and cook it until your meat thermometer says 165°F. That should take anywhere from 50 to 90 mins.
In The Oven
Preheat your oven to 375°F. Place the prepared pan with the chicken can on top inside. Next, bake until the chicken reads to 165°F. It should be around 45 – 55 mins.
Cooking Tips
- Wash the bird well, and dry it using paper towels to get crispy skin.
- Crumple up some foil to help support the meat to stay upright on the can if needed.
- Use some mesquite wood chips in the grill for extra smoky flavor.
- Don’t let the thermometer touch the bone. You want to place it as deep into the middle of the bird (thigh works great) without touching the can or bone.
- Cover the meat with foil loosely in case the skin starts browning too early.
- Let the bird rest for 10 mins after grilling or roasting.